Photography: sometimes it is not easy to know how to set the correct film stock in scanning software such as Silverfast; getting it wrong can have remarkable consequences for image quality.
For some days now I have been scanning negatives taken in 1990; nine films all Kodak Ektar 25. I have a problem: my scanner software does not have a setting for Ektar 25, only one for Ektar 100, so what do I do? How do I confirm what film it is from the negatives themselves, and what software settings should I use? I have discovered how to get good results…
I have no memory of buying this film and had previously assumed it was ASA100. Research online has proven to me that this film is indeed 25ASA. A very good source of information for Kodak film is filmlabs.org and in particular Tom Philo’s List of Kodak Film Numbers – click here.

On that list I found the code 5100 and sure enough – it is Ektar25. Problem solved. Research elsewhere told me that this particular film is for ‘professional’ photographers and was (still is?) highly thought-of. Manufacture was discontinued in 1992 and Kodak replaced this film with Royal Gold.
Incidentally, I scanned an image using the Extar100 and the Royal Gold100 settings with dramatically different results as you will see in the images reproduced below. Which is best? I will leave you to decide. If nothing else, these images demonstrate the importance of getting the right film stock setting.

Scanner software: Silverfast 9 SE Plus; scanner: Epson V850 Pro. Which image above is best? The film is actually Ektar25.
I have to admit that I spent over a day puzzling over settings until I found a way to compensate, if that is the right word, for the lack of an Ektar25 setting in Silverfast. After testing a number of different images, from Yosemite to the Nevada desert, I settled on the Ektar100 setting and compensated largely by changing the exposure – something I rarely do – with surprisingly good results.

ABOVE: the ‘negafix’ tool in Silverfast. Kodak is selected and the list of available film types for that vendor. Ektar is present but only as ASA100. Royal Gold is supposed to be similar, being the replacement for Ektar and comes with four ASA settings: 100, 200, 400 and 1000. However, the Royal Gold setting is not right for this film, with pictures being too dark. I was confused at first because I was scanning images in very bright sun in the Nevada desert, and the Royal Gold setting seemed good. However, better to use Ektar100 and reduce the exposure setting in Apple Photos or Lightroom.
Incidentally, whilst you can change exposure within Silverfast I found my preference was to do it in the processing software. I actually ‘processed’ these images twice, once in Apple Photos/Luminar in combination and once in Lightroom. Both were good but I often found the Photos/Luminar combination slightly better.
Some years ago I scanned these particular negatives in jpeg at 4800ppi. Today I am scanning them in tiff at 3200ppi with very good results. I think 4800ppi, tempting though it might seem, is overkill. At 3200ppi a typical 3×2 image is 4550×3060 at a resolution of 300ppi and about 46MB.
So, there you have it. I doubt that many of you will have a similar problem but in case you do, hopefully these notes have been useful. If the correct ASA/ISO is not available in the scanner software, use the nearest and compensate with the exposure setting.
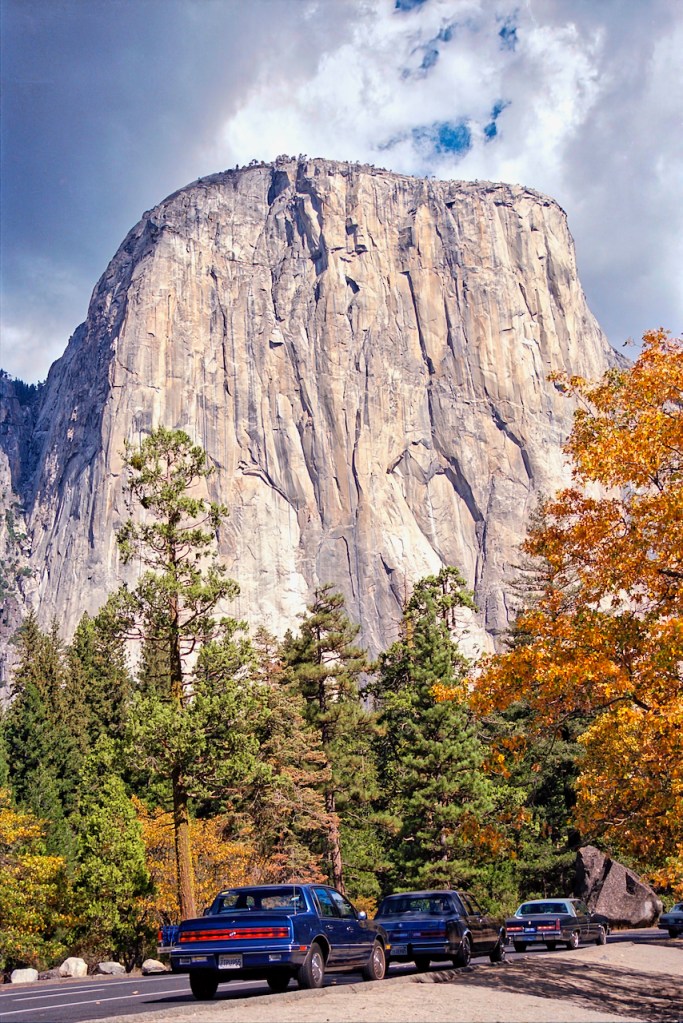
Image above taken on Kodak Extar25 film, scanned at 3200ppi (300ppi resolution) on Epson V850 Pro scanner. Processed using Apple Photos/Luminar Neo.

Any thoughts? Leave a comment!